Views: 20
這篇分享UOF2的APP客製作法,有需要的可以參考。
手機介接能做什麼?
假設我們有個讓主管簽請假單的系統,在APP介接可以做到這兩種
- 顯示需要簽核的單數。
- 點下去開啟簽核「頁面」。
在APP上顯示其他系統的待簽筆數-思路

簡單說明就是手機端APP透過WebService抓取其他系統的資訊後回傳給APP,如何抓取其他系統資訊則不在這篇文章中,如果您需要這方面的客製可以來信。
點擊圖示後 開啟網頁簽核-思路

這邊主要是進入APP後,點連結,APP傳送帳號資訊給負責介接兩個系統的頁面(簡稱SSO),由SSO頁面處理解密與登入,接著跳轉至其他資訊系統的進行登入,如何登入其他系統則不在此篇教學範圍,如果您需要這方面的客製可以來信。
官方文件
APP這邊要看兩個文件
U-OfficeForce30.0系統開發手冊(UOF App).docx,這個文件在官方的文件管理中,需要跟一等一簽屬MA才會有帳號能下載加解密範例.txt,這個在EIP裡面選單管理的範例中


加解密範例.txt
這個在系統管理 > 自訂選單 > 新增參數

WebService-在APP上顯示筆數
這裡我們要先在EIP的CDS目錄下寫一個WebService 跟 Web.Config,寫在EIP內的原因是可以透過EIP的內建函數拿到更多帳號資料,例如EMAIL
Visual Studio 2022

這邊建議使用Visual Studio 2022之前的版本,2026之後的版本將WebService 開發範本移除掉了
新增WebService
~/CDS/MOBILE_WS/App101.asmx
先在CDS資料夾下新增一個MOBILE_WS資料夾 然後再資料夾內這邊我新增一個WebService檔案,新增WebSerice的步驟如下


- 選
Web Service (ASMX) - 檔名自己依照需求取名
- 不要勾選
Place code in separate file Add

[WebMethod]
public string GetCount(string param)
{
    return "Hello World";
}
這邊我們把預設的範本改為GetCount ,內容不一定要回傳數字,傳一段文字也可以。
Web.config
然後因為我們要透過APP觀看,由於頁面架設在UOF站台下預設都需要登入才能抓資料,所以需要另外設定WebSerive允許未登入就允許存取,透過Web.config允許

<?xml version="1.0"?>
<configuration>
	<location path="App101.asmx">
		<system.web>
			<authorization>
				<allow users="*"/>
			</authorization>
		</system.web>
	</location>
</configuration>
<location path="App101.asmx"> 這邊的App101.asmx 請依照需求改成需要的檔名
設定APP

設定路徑:系統管理 > 自訂面板與通知


連線測試發生錯誤500的原因

- 少了
Web.config WebService編譯有問題
通常測試方式是開啟無痕模式
APP實際測試
這邊傳送過去基本上僅限純文字,無法將文字變色,接下來我們模擬一下系統介接的部分。
處理WebService的輸入參數-取得登入者資訊
這邊我建立了一個UserInfo,然後透過EBUser這個物件取得進一步的使用者資料,並且回傳Email,寫到這邊差不多就能透過兩邊帳號的Email串接。
我的完整程式碼如下
<%@ WebService Language="C#" Class="App101" %>

using System;
using System.IO;
using System.Web;
using System.Web.Services;
using System.Web.Services.Protocols;
using Ede.Uof.EIP.Organization.Util;
using Newtonsoft.Json;

[WebService(Namespace = "http://tempuri.org/")]
[WebServiceBinding(ConformsTo = WsiProfiles.BasicProfile1_1)]
// To allow this Web Service to be called from script, using ASP.NET AJAX, uncomment the following line.
// [System.Web.Script.Services.ScriptService]
public class App101 : System.Web.Services.WebService
{

    [WebMethod]
    public string GetCount(string param)
    {
        try
        {
            //將使用者資料轉物件
            var userInfo = JsonConvert.DeserializeObject<UserInfo>(param);
            //取得使用者資訊
            EBUser ebUser = new UserUCO().GetEBUser(userInfo.UserGuid);
            if (ebUser == null)
            {
                return "NO DATA";
            }
            //進行介接
            return $"Hello {ebUser.Email}";
        }
        catch (Exception e)
        {
            //這邊可以寫Error Log,這邊省略
            return $"Error No data";
        }
    }

    private class UserInfo
    {
        /// <summary>
        /// 使用者GUID
        /// </summary>
        public string UserGuid { get; set; }

        /// <summary>
        /// 帳號
        /// </summary>
        public string Account { get; set; }

        /// <summary>
        /// IP
        /// </summary>
        public string IP { get; set; }

        /// <summary>
        /// 員工編號
        /// </summary>
        public string EmployeeNo { get; set; }

        /// <summary>
        /// 裝置資訊(實際上存入另一個JSON字串,需另外解析)
        /// </summary>

        public string DeviceInfo { get; set; }
    }
}
測試
跟其他系統介接
思路上就是搞清楚其他系統要如何取得帳號對應的資料,我其實覺得其他系統可以做個支援的頁面..
這邊如果需要付費協助可以準備好您的需求文件來信
行動版的 SSO頁面
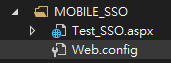
這邊我在CDS下先建立一個MOBILE_SSO,然後建立一個頁面進行模擬
頁面要做幾件事
- 接收傳入的加密資料
- 解密
- 將資料顯示在頁面上
![]()
這邊建立好檔案後先擺著,我們還需要產生Web.config
<?xml version="1.0"?>
<configuration>
	<location path="Test_SSO.asmx">
		<system.web>
			<authorization>
				<allow users="*"/>
			</authorization>
		</system.web>
	</location>
</configuration>
這邊同樣設定頁面沒登入可以瀏覽
SSO 連結設定
- 網址務必要填開發(測試)環境的IP或網址,不能填入
localhost - 填入
AES加密所需的KEY跟IV可以透過這個連結產生,建議開發環境,測試環境,正式環境設定要不同。 - 設定要傳送到
SSO的參數,請依SSO介接需求設定 - 預覽連結,按下去可以產生連結

參數部分,基本上就是依照需求設置就好,不同的系統我會建議用EMAIL進行串接,然後記得要啟用加密。

- 我新增兩個參數,EIP帳號跟時間,時間在這邊用於檢驗連結有效性提升安全性。
- 預覽連結可以看到
SSO連結的模樣,可以知道這邊的SSO是透過GET進行介接的。
這邊設定好之後先儲存,然後畫面可以留在這個頁面
接著我們回到Visual Studio進行測試
SSO頁面 解密連結參數
這時候我們可以來寫程式了,思路是這樣
- 讀取參數
- 解密(程式我大幅簡化過了,這邊可以直接抄作業)
- 驗證連結點下去的時間,這邊設定五分鐘,這邊也可以直接抄作業
- 跳轉到其他系統,這邊就需要您自己處理了
using System;
using System.Security.Cryptography;
using System.Text;
using System.Web;
using System.Web.UI;

public partial class CDS_MOBILE_SSO_Test_SSO : System.Web.UI.Page
{
    private readonly string aesKEY = "....."; //這邊依照需求填入
    private readonly string aesIV = "...."; //這邊依照需求填入
    protected void Page_Load(object sender, EventArgs e)
    {
        //連結網址範例 使用Get http://UOF網址/CDS/MOBILE_SSO/Test_SSO.aspx?acc=xBJ9eaEijBJKyv7F7%2bpsEA%3d%3d&ssotime=4emm%2boJczNe1yakIbm1WyA%3d%3d

        if (IsPostBack)
        {
            return;
        }
        //抓取連結參數 acc 和 ssotime
        string acc = Request.QueryString["acc"];
        string ssoTime = Request.QueryString["ssotime"];

        if (string.IsNullOrEmpty(acc) || string.IsNullOrEmpty(ssoTime))
        {
            return;
        }

        try
        {
            txtAcc.Text = Decrypt(acc, aesKEY, aesIV);
            txtSSOTime.Text = Decrypt(ssoTime, aesKEY, aesIV);
            //解密後的時間格式是yyyyMMddHHmmss 轉換成DateTime 驗證是否超過5分鐘 顯示在 txtIsTimeout
            DateTime ssoDateTime = DateTime.ParseExact(txtSSOTime.Text, "yyyyMMddHHmmss", null);
            if (DateTime.Now.Subtract(ssoDateTime).TotalMinutes > 5)
            {
                txtIsTimeout.Text = "連結已超過5分鐘,請重新產生連結";
            }
            else
            {
                txtIsTimeout.Text = "連結有效";
                //這裡可以加入登入邏輯,例如根據txtAcc.Text的帳號資訊進行另一個系統的登入
            }
        }
        catch (Exception ex)
        {
            txtAcc.Text = string.Empty;
            txtSSOTime.Text = string.Empty;
            Response.Write(HttpUtility.HtmlEncode(ex.Message));
        }
    }

    /// <summary>
    /// 解密連結參數
    /// </summary>
    /// <param name="data">要解密的資料</param>
    /// <param name="strKey">加密金鑰</param>
    /// <param name="strIV">向量</param>
    /// <returns>解密後的字串</returns>
    private static string Decrypt(string data, string strKey, string strIV)
    {
        byte[] tmpkey = Encoding.UTF8.GetBytes(strKey);
        byte[] tmpIV = Encoding.UTF8.GetBytes(strIV);

        byte[] key;
        byte[] iv;
        using (MD5CryptoServiceProvider mD5Provider = new MD5CryptoServiceProvider())
        {
            key = mD5Provider.ComputeHash(tmpkey);
            iv = mD5Provider.ComputeHash(tmpIV);
        }

        byte[] encryptData = Convert.FromBase64String(data);

        using (RijndaelManaged aesProvider = new RijndaelManaged())
        using (ICryptoTransform aesDecrypt = aesProvider.CreateDecryptor(key, iv))
        {
            byte[] result = aesDecrypt.TransformFinalBlock(encryptData, 0, encryptData.Length);
            return Encoding.UTF8.GetString(result);
        }
    }
}
<%@ Page Language="C#" AutoEventWireup="true" CodeFile="Test_SSO.aspx.cs" Inherits="CDS_MOBILE_SSO_Test_SSO" %>
<!DOCTYPE html>
<html xmlns="http://www.w3.org/1999/xhtml">
<head runat="server">
<title>SSO 介接DEMO</title>
</head>
<body>
<form id="form1" runat="server">
<div>
<table>
<tr>
<td>acc</td>
<td><asp:TextBox ID="txtAcc" runat="server"></asp:TextBox></td>
</tr>
<tr>
<td>ssotime</td>
<td><asp:TextBox ID="txtSSOTime" runat="server"></asp:TextBox></td>
</tr>
<tr>
<td>是否超時</td>
<td><asp:TextBox ID="txtIsTimeout" runat="server"></asp:TextBox></td>
</tr>
</table>
</div>
</form>
</body>
</html>
測試SSO

可以直接點預覽連結產生後的測試連結,直接測試

測試畫面如上,可以看到解密與驗證超時都正常運作。
剩下就是處理好介接跟在手機上測試
0 Comments